
Causes for Canon Printer Error 5100
There could be many causes which forcing your printer to display the Canon printer error 5100 notification. These include:- This may be because of paper jam inside the machine
- The ink tank might require to be correctly installed
- The protective material might be avoiding the print head from moving suitably.
- This may be also due to debris in the carriage head
- A minor glitch arises because of improper boot-up or shut down process.
Solution for Canon Printer Error 5100
Regrettably, Canon error 5100 signifies a hardware problem in your printer. If the error is the result of a bad motor/gear/belt, bent / damaged rail, or a bad print, there is nothing you can do except replace the item directly. But, if the problem is the result of some faulty setting or cleaning of related stuff, then we have provided some solutions that you can use to solve the problem. Thus, without wasting any more time lets go to the main topic. Solution #1: Reset Printer and Reseat the Ink Cartridges If the Canon error 5100 begins occurring after you alter the ink cartridges then it is feasible that the cartridges are not suitably seated in the position. In this situation, you require to remove the cartridge and then reinstall it in its position again to fix the issue. If you don’t know how to suitably install a cartridge, then follow the mentioned below steps carefully:- Initially, turn off the Canon printer and then separate the power cable from the power outlet.
- Now, Switch on the Power button while you plug the cable back in.
- Subsequently, click the Stop/Reset button twice while holding down the power button. By executing this step you will be able to activate the factory mode of your printer.
- Now, use the navigation key from your printer’s control panel to get the Shipping Mode 3 on the LCD display. Once you find it click the Ok button to choose the option.
- Subsequently trying to print a test page by clicking the “Stop/Reset” button when you see the “Without Cleaning” notification.
- Now gently lift the Canon printer cover and wait for the cartridge to move to the left. Once the cartridges move to the left remove the plug of the printer from the outlet.
- After that, lift out both ink cartridges and then shut the cover before you turn on the printer.
- Then wait till you view the message that says Replace Cartridges and once its dose reinstall the cartridge back in its place
- Subsequently, wait a few minutes until the printer recognizes the cartridges.
- Initially, load plain white paper in the input tray.
- After that, touch the button next to the Setup icon in the lower-left corner of the control panel of the Canon printer.
- Next, use the navigation key to choose Tools, and then touch OK.
- Subsequently, use the Right Arrow button to choose Clean Printhead, and once again click OK. Once you do that, the printer will begin the automatic cleaning process.
- Initially, load a few sheets in the Canon printer and then turn On your computer.
- From the System Preferences of your computer, open the ‘Print & Scan’ to choose your Canon printer
- Now, select the ‘Options & Supplies’ option for the printer and next choose Utility.
- Subsequently, open Printer Utility to choose Print Head Alignment and then click Next.
- Next, choose Print to print an alignment sheet and then check the printed pattern.
- Now, follow the instructions on the screen to select the number representing the best-printed pattern for each set, and after selecting each pattern number click Next. But, if no patterns are aligned in one or more of the sets, select the closest one in each set and tap Realignment.
- After that, print another alignment sheet and examine it and once you get your desired result click on the Finish button to complete the alignment.
Dial Canon Printer Support Number for instant solution:
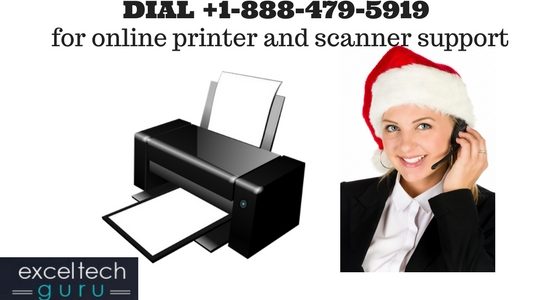 We wish that after following the above-mentioned steps, you would have easily fixed Canon printer error 5100 easily. If not so or you are unable to fix it because of any reason. No need to worry at all, dial Canon Printer Support Number +1-888-479-5919 to get in touch with professional experts who will instantly resolve the issue. They will provide you step by step instructions so that you may fix the issue of your own.
You can also watch our video to solve your problem very easily:
We wish that after following the above-mentioned steps, you would have easily fixed Canon printer error 5100 easily. If not so or you are unable to fix it because of any reason. No need to worry at all, dial Canon Printer Support Number +1-888-479-5919 to get in touch with professional experts who will instantly resolve the issue. They will provide you step by step instructions so that you may fix the issue of your own.
You can also watch our video to solve your problem very easily:
FREQUENTLY ASKED QUESTIONS
Warning: foreach() argument must be of type array|object, bool given in /home/u165496469/domains/exceltechguru.com/public_html/wp-content/plugins/responsive-accordion-and-collapse/front/ac-content.php on line 57


