In this article, we have provided some easy solutions on how to fix HP Printer Error 0XC19A0020. Many users face HP Printer Error 0XC19A0020 in their HP Printers and also face problems in fixing that Error 0XC19A0020. If you are one among those, then simply follow the troubleshooting steps mentioned below in sequential order.
Simple Steps to fix HP Error 0XC19A0020
 Step 1: Check for any Paper Sensing Problem
This specific error may arise when there is a paper sensing issue. Thus, you have to examine if there is any paper sensing issue. Occasionally, there can be ‘ink mist’ interference with the media sensor or sensing optics based on the amount you have printed to date.
Step 2: Check Smart Chip of the Cartridge
- Switch ON your printer and remove the cartridges cautiously.
- Now, examine the smart chip interface and notice that its position is right or not.
- If there is any damage to the smart chip, then change the cartridge’s smart chip with a new one.
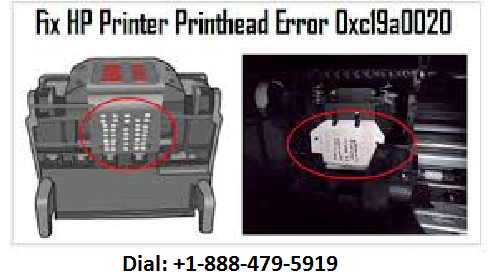
Step 3: Clean the Print Head
- Initially, remove the Printer Head unit by lifting the print head release lever.
- Then remove the printer head cautiously and clean its contacts with a damp cloth.
- Furthermore, clean the electrical contacts with that cloth and Clean the contacts until the ink marks are removed.
- Now reinstall the print head unit and lower the lever handle to lock the printer head unit into its place safely.
- Ultimately, print a sample document to know if the problem is fixed. If not, follow step 4.
Step 4: Unplug and Plugin the Power Cable of Printer
- During the printer is in ON position, separate the power cable of your printer.
- Wait for a minimum of 1-2 minutes and plug back the power cable to the printer.
- Click the power button to switch ON the printer if the printer doesn’t power ON automatically.
- Print a document to check the error is resolved or not.
- If the HP Printer Error 0XC19A0020 persists, try step 5.
Step 5: Install Ink Cartridges
- Initially, Switch ON your HP printer.
- Now open the top access door of your HP printer.
- Remove the carriage by clicking the old ink cartridges.
- Remove the entire ink cartridges and install them back properly and correctly.
- Then reset your printer.
- Now, perform a print job to check if the HP Printer Error 0XC19A0020 issue has been resolved.
Dial HP Printer Customer Service for quick Solution
We wish that after following the above-mentioned steps you would have fixed hp printer error 0xc19a0020. If not so or you come across any issue while doing so, get in touch with experts at
HP Printer customer support+1-888-479-5919 who will resolve the error quickly with the most suitable solutions. Dial toll-free whenever require, we are available 24*7, 365 days for your support.
Check the solution for:
0xc19a0013 HP Printer Error Code